


The Witcher 3: Wild Hunt is widely celebrated for its vast open world, layered storytelling, nuanced choices, and deeply reactive combat and progression systems. Yet newcomers and returning players alike often find its systems — from alchemy and sign usage to gear progression and quest choices — overwhelming. This guide is a practical how‑to aimed at helping you master Geralt’s journey from first steps to endgame power. It breaks progression into ten chronological and thematic stages, each with focused advice: preparation, leveling and builds, combat techniques, alchemy and equipment, quest choices and consequences, exploration and map mastery, Gwent and NPC systems, expansions integration (Hearts of Stone and Blood and Wine), NG+ and deathmarch strategies, and finally post‑game completion and role‑play approaches. Each section contains two to three paragraphs, with subheadings and lists where useful, so you can apply techniques immediately and deepen your Witcher craft.
1. Preparing for the Journey: Settings, Difficulty, and Early Choices
Your experience with The Witcher 3 begins before the first cutscene if you take time to configure settings and pick the right difficulty and gameplay options. Difficulty affects not just combat but how meaningful your potion and equipment choices become. For newcomers, "Story and Sword" gives more narrative focus; "Blood and Broken Bones" and "Death March" increase challenge and reward careful preparation. Consider starting on a higher difficulty if you want to emphasize role‑playing and make the combat loop and alchemy systems vital.
Beyond difficulty, tweaking camera, HUD, and subtitle settings improves comfort. Turn on "enemy health bars" if you prefer clearer combat feedback, or leave them off for immersion. Decide early whether you will use fast travel liberally; restricting fast travel deepens exploration and adds weight to crafting and resource management. Finally, choose your initial sign and gear focus by reading skill descriptions: early decisions around investing in Quen or Aard, swords vs signs, and alchemy vs combat trees will shape your first 20 hours.
Preparation checklist:
- Pick a difficulty that matches desired challenge (Story/Sword → narrative; Death March → tactical play).
- Adjust HUD/camera and enable subtitles for clarity.
- Decide playstyle focus early (signs, swords, alchemy) to guide early skill purchases.
2. Efficient Early Leveling: XP Sources and Quest Prioritization
Leveling in The Witcher 3 is primarily driven by quests and monster contracts. Rather than rushing the main story, spread your time across local secondary quests and Witcher contracts — these provide substantial XP and often unlock useful gear and diagram rewards. Prioritize contracts early on because they typically require you to approach fights prepared and thus teach you the monster matchup loop while rewarding sizable experience and crafting materials.
Avoid overleveling trivial side content that yields little XP relative to time spent; use the quest log to track suggested levels and tackle content within or slightly above your level range. Treasure hunts are excellent secondary objectives: many lead to witcher gear diagrams that unlock power spikes at levels 11–16 and beyond. Balance: do a couple of side quests and a contract between main missions to gradually increase capability without spoiling narrative surprises.
Leveling priorities:
- Contracts for XP, materials, and diagrams.
- Secondary quests that unlock merchants, fast travel, or key characters.
- Treasure hunts for witcher gear diagrams early (Wolf School gear is a common early priority).
3. Building Geralt: Skill Trees, Builds, and Respec Strategy
Geralt’s builds pivot on three primary ability trees: Combat, Signs, and Alchemy (plus general and mutation nodes in expansions). Early build decisions influence later play: a swords‑focused build benefits from strong attack and stamina regen nodes, while a sign playthrough requires early investment in Quen (for survivability) and Yrden (for crowd control and spectral monsters). Hybrid builds are viable but demand heavier planning to avoid spreading skill points too thin.
Respecs become available later via the herbalist or during expansions if you don’t use debug mods. Until then, plan a coherent progression: invest in core nodes that unlock synergy skills (e.g., "Strong Back" for gear weight, "Resolve" for sign intensity). Consider mutation or Grandmaster skill aspirations if you aim for late‑game builds; these often necessitate specific preconditions and resource investments. A practical method is to outline a short‑term (levels 1–20) and long‑term (levels 21–50) skill plan and save points before major redistributions.
Build planning checklist:
- Early game: commit to Combat or Signs with a minimum of 6–8 points in primary tree.
- Mid game: unlock hybrid synergistic nodes (e.g., Stamina regen + critical hit nodes).
- Late game: aim for set bonuses via witcher gear and consider respec once grandmaster or mutation options are available.
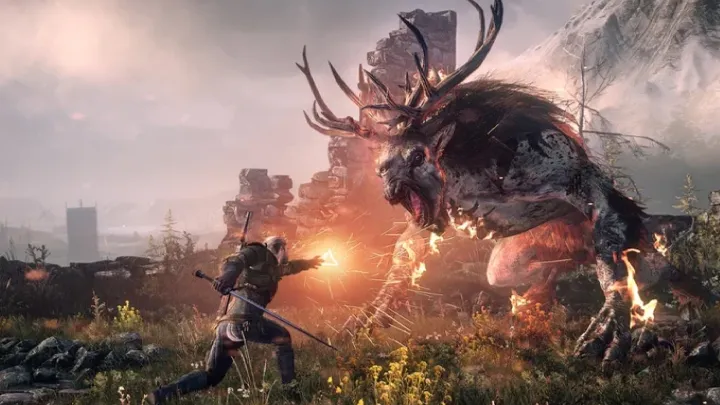
4. Combat Mastery: Dodging, Parrying, and Using Signs Effectively
Combat in The Witcher 3 rewards preparation and pattern recognition. Study enemy tell animations: many monsters telegraph devastating attacks that must be rolled or dodged rather than parried. For human foes, moderate use of parry and riposte works well; for larger monsters, rely on signs, bombs, and special oils. Timing is paramount—learn when to roll through light attacks and when to hold a sustained heavy attack.
Quen is arguably the single most forgiving sign for survival. Invest in the Quen node early if you prefer an aggressive swordplay approach that tolerates occasional mistakes. Yrden shines against wraiths and spectral opponents; Axii can end fights nonlethally or remove flanking. Use Aard to stagger shields and break enemy stance for critical hits. For higher difficulties, alternate bombs (dancing star, Samum) with traps and oils to break enemy resistances. Always read bestiary entries and craft the appropriate oil prior to battles.
Combat techniques:
- Read enemy tells and adapt: dodge vs parry based on creature type.
- Use Quen as a safety buffer; combine Yrden + Aard for crowd control.
- Prep with bombs and oils tailored to the enemy bestiary notes.
5. Alchemy and Inventory: Potions, Decoctions, and Resource Management
Alchemy is a deep, game‑changing pillar of Witcher play. Potions like Swallow (health regen), Thunderbolt (significant attack buff), and Tawny Owl (stamina regen) amplify your combat effectiveness. Decoctions (available after progression) provide massive buffs with health costs or special triggering conditions—build around these for endgame viability. Alchemy scales with skill investment: the more you invest in alchemy nodes, the less you rely on frequent replenishes.
Inventory and resource management matter heavily on longer treks. Avoid carrying excessive junk—sell or dismantle as you progress. Learn merchant specialties: armorers and master craftsmen (or certain side characters in regions) buy and sell rare diagrams. Keep crafting significant items like bombs and crossbow bolts if you plan to fight flying monsters or long‑range engagements. There’s also a tactical decision in using potions in normal fights: on early difficulties you may conserve, but on Death March you must micro‑administer potions often.
Alchemy and resource list:
- Essential potions: Swallow, Thunderbolt, Tawny Owl, Golden Oriole (poison resistance).
- Essential decoctions: Ekhidna (healing), Basilisk (stamina/regen) — choose based on playstyle.
- Inventory tips: dismantle duplicates, sell junk, keep rare crafting diagrams until you can craft sets.
6. Gear Progression: Witcher Gear Sets, Upgrading, and Runes
Gear progression in The Witcher 3 centers on set pieces and incremental upgrades: Witcher School gear (e.g., Feline, Ursine, Griffin, Manticore) provides synergy with builds (fast attack vs heavy armor vs sign intensity). Hunt for diagrams early via treasure hunts and contracts. Prioritize a full set that complements your chosen build: Feline for light, fast builds; Ursine for heavy tanking and alchemy hybrids; Griffin for sign‑heavy builds.
Upgrading armor and swords is vital—don’t wear out‑leveled gear too long. Blacksmiths and armorers can craft and enhance gear to higher tiers if you provide diagrams and resources. Remember weapon runes and glyphs: socket upgrades can adjust critical damage, armor penetration, or sign intensity. The expansion Blood and Wine adds grandmaster variants requiring rare materials; plan late game resource hoarding for these upgrades.
Gear progression checklist:
- Early: secure a full beginner witcher set via treasure hunts.
- Mid: upgrade to superior variants through blacksmiths and resource gathering.
- Late: aim for enhanced/grandmaster sets and socket weapons with runes/glyphs.
7. Quest Choices and Narrative Consequences: How to Plan Outcomes
The Witcher 3’s narrative is famously reactive. Your choices in side quests and story arcs reverberate across the game. Some consequences are immediate (villager spared or killed); others unfold in the epilogue (towns prospering or decaying, key character fates). To manage outcomes intentionally, save before major choice points and walk away to reflect on consequences if uncertain.
Key quest chains—like Bloody Baron, Keira Metz, and Ciri’s training—offer moral ambiguity and hidden long‑term outcomes. If you care about specific endings or NPC survivals, consult quest walkthroughs or meta guides, but consider embracing the moral complexity—many players enjoy encountering unintended fallout. For role‑players, commit to a value system early (mercy vs pragmatism) and make consistent choices to maintain narrative coherence.
Decision making tips:
- Save before major choices to test alternative outcomes.
- Follow quest chains thoroughly; missing a step early can lock later outcomes.
- Document NPC names and locations if you aim for specific end states or character survival.
8. Exploration and World Mastery: Map Secrets, Fast Travel, and Hidden Activities
Exploration rewards patience. Hidden merchant caches, guarded treasure chests, secret monster dens, and enigmatic NPCs populate the map. Don’t rely solely on the minimap—climb towers, use crossbow to hit unreachable switches, and talk to townfolk; many quests are triggered by casual conversations. Fast travel is convenient but reduces serendipity; walking or riding can yield unexpected contracts or environmental storytelling that deepens immersion.
Use Witcher senses like a systematic tool: scan areas methodically to reveal tracks, loot, and hidden mechanisms. Certain environmental puzzles require careful observation—note the spawn points of resources (alchemic herbs often cluster around particular biome features). Seasonal and regional variation matters: northern swamps harbor different loot and enemy types than Velen’s marshes or Skellige’s windswept isles. Embrace horseback or boat navigation for long journeys but scope key regions on foot.
Exploration checklist:
- Visit notice boards for contracts and treasure map leads.
- Use Witcher senses to reveal hidden paths and monster lairs.
- Prioritize thorough searches of dungeons for diagrams and rare crafting resources.
9. Integrating Expansions: Hearts of Stone and Blood and Wine Strategies
The expansions transform the base game with new mechanics, higher level caps, and unique gear. Hearts of Stone introduces morally complex quests and the runewright system, which allows specialized weapon rune crafting—research the runewright’s recipes and plan resource hoarding. The expansion’s early enemies scale differently; prepare your build for new enemy types and puzzles.
Blood and Wine offers a self‑contained region, Toussaint, with grandmaster witcher gear and an increased level cap. It’s effectively an endgame biome. Save your best resources and gold for this region if you aim to obtain grandmaster gear. The expansion also introduces new mutagens and alchemy synergies: read patch notes and in‑game codex entries to adapt your build. For completionists, complete expansion quests after finishing the main storyline to preserve narrative cohesion (unless you enjoy alternate timelines).
Expansion integration tips:
- Heart of Stone: focus on runes and specialized weapon upgrades.
- Blood and Wine: hoard resources for grandmaster gear; expect harder, more varied enemies.
- Timing: complete expansions after midgame for balanced challenge, or treat them as endgame content.
10. New Game Plus, Death March, and Post‑Game Mastery
New Game Plus (NG+) lets you carry items and money into a fresh playthrough, amplifying experimentation possibilities. If you enjoyed a swords‑oriented run, use NG+ to explore a sign/alchemy hybrid without losing crafted gear. Death March — the toughest difficulty — is where all your systems must perform optimally: potions, decoctions, oils, and precise parries/dodges become mandatory. Start Death March on NG+ once you understand enemy patterns to avoid frustration.
Post‑game mastery is about exploration of alternate builds, role‑playing variations, and achievement completion. Try a pacifist playthrough focusing on Axii to end fights without bloodshed, or a pure alchemy build relying solely on decoctions. Document your builds and create save backups at critical junctures for replaying different narrative outcomes. Many players find the most fun in iterating builds, collecting all witcher gear sets, and tackling every contract and hidden secret.
Post‑game checklist:
- Try NG+ to test different builds while retaining gear.
- Use Death March to experience the toughest, most rewarding combat.
- Explore role‑play or achievement runs to fully exhaust content.
Conclusion
Mastering The Witcher 3: Wild Hunt requires more than grind; it demands understanding systems and making intentional choices. Balance your early progression with smart quest prioritization, choose a coherent build and invest skill points purposefully, and master combat through observation, adequate alchemy, and gear synergy. Explore thoroughly, treat expansion content as both narrative and mechanical evolution, and don’t be afraid to respec or start NG+ to experiment. Most importantly, let the game surprise you—its best stories and mechanics often arise from moments where mechanics and narrative intersect. With this ten‑part how‑to structure, you’ll move from being a competent hunter to a maestro of monster matches, political intrigue, and the rich tapestry that makes The Witcher 3 one of the most enduring RPGs of its generation.
Summary
Master The Witcher 3 by planning difficulty, prioritizing contracts, building coherent skill sets, mastering combat/alchemy, upgrading gear, and exploring expansions.